
Hello!
In this article, we will create and apply the blur effect to the Image control using .NET MAUI behaviors.
The effect allows the blurring of out-of-focus parts of an image. It is usually used in portrait photos.
For this article, I use a .NET MAUI combination of filename-based multi-targeting and folder-based multi-targeting. For more information, see Combine filename and folder multi-targeting.
Let's start by creating a new BlurBehavior.cs file:
public partial class BlurBehavior
{
	public static readonly BindableProperty RadiusProperty = BindableProperty.Create(nameof(Radius), typeof(float), typeof(BlurBehavior), 5f, propertyChanged: OnRadiusChanged);

	public float Radius
	{
		get => (float)GetValue(RadiusProperty);
		set => SetValue(RadiusProperty, value);
	}

	static void OnRadiusChanged(BindableObject bindable, object oldValue, object newValue)
	{
		var behavior = (BlurBehavior)bindable;
		if (behavior.imageView is null)
		{
			return;
		}

		behavior.SetRendererEffect(behavior.imageView, Convert.ToSingle(newValue));
	}
}
Now we need to implement our BlurBehavior for each platform.
Android
Create BlurBehavior.Android.cs:
public partial class BlurBehavior : PlatformBehavior<Image, ImageView>
{
	ImageView? imageView;
	protected override void OnAttachedTo(Image bindable, ImageView platformView)
	{
		imageView = platformView;
		SetRendererEffect(platformView, Radius);
	}

	protected override void OnDetachedFrom(Image bindable, ImageView platformView)
	{
		SetRendererEffect(platformView, 0);
	}

	void SetRendererEffect(ImageView imageView, float radius)
	{
		if (OperatingSystem.IsAndroidVersionAtLeast(31))
		{
			var renderEffect = radius > 0 ? GetEffect(radius) : null;
			imageView.SetRenderEffect(renderEffect);
		}
	}

	static RenderEffect? GetEffect(float radius)
	{
		return OperatingSystem.IsAndroidVersionAtLeast(31) ?
			RenderEffect.CreateBlurEffect(radius, radius, Shader.TileMode.Decal!) :
			null;
	}
}
In Android 12, Google introduced the RenderEffect API. This enables developers to effortlessly apply graphic effects such as blurs, color filters, and more to Views.
iOS/MacCatalyst
Create BlurBehavior.iOS.cs:
public partial class BlurBehavior : PlatformBehavior<Image, UIImageView>
{
	private CGImage? originalImage;
	UIImageView? imageView;

	protected override void OnAttachedTo(Image bindable, UIImageView platformView)
	{
		imageView = platformView;

		originalImage = platformView.Image?.CGImage;
		SetRendererEffect(imageView, Radius);
	}

	protected override void OnDetachedFrom(Image bindable, UIImageView platformView)
	{
		SetImage(platformView, originalImage);
	}

	static void SetImage(UIImageView imageView, CGImage? image)
	{
		if (image is null)
		{
			return;
		}

		imageView.Image = new UIImage(image);
	}

	void SetRendererEffect(UIImageView imageView, float radius)
	{
		if (originalImage is null)
		{
			return;
		}

		var myContext = CIContext.Create();
		var inputImage = new CIImage(originalImage);
		var filter = new CIGaussianBlur
		{
			InputImage = inputImage,
			Radius = radius
		};
		var resultImage = myContext.CreateCGImage(filter.OutputImage!, inputImage.Extent);
		SetImage(imageView, resultImage);
	}
}
Windows
Create BlurBehavior.Windows.cs:
public partial class BlurBehavior : PlatformBehavior<Image, Microsoft.UI.Xaml.Controls.Image>
{
	Microsoft.UI.Xaml.Controls.Image? imageView;
	protected override async void OnAttachedTo(Image bindable, Microsoft.UI.Xaml.Controls.Image platformView)
	{
		imageView = platformView;
		SetRendererEffect(platformView, Radius);
	}

	protected override void OnDetachedFrom(Image bindable, Microsoft.UI.Xaml.Controls.Image platformView)
	{
		SetRendererEffect(platformView, 0);
	}

	void SetRendererEffect(Microsoft.UI.Xaml.Controls.Image imageView, float radius)
	{
		var graphicsEffect = new GaussianBlurEffect()
		{
			Name = "Blur",
			Source = new CompositionEffectSourceParameter("Source"),
			BlurAmount = radius
		};

		var compositor = ElementCompositionPreview.GetElementVisual(imageView).Compositor;
		var blurEffectFactory = compositor.CreateEffectFactory(graphicsEffect);

		var brush = blurEffectFactory.CreateBrush();
		var destinationBrush = compositor.CreateBackdropBrush();
		brush.SetSourceParameter("Source", destinationBrush);

		var blurSprite = compositor.CreateSpriteVisual();
		blurSprite.Brush = brush;
		blurSprite.Size = imageView.ActualSize;
		ElementCompositionPreview.SetElementChildVisual(imageView, blurSprite);
	}
}
Finally, apply behavior to our image:
<Image Source="dotnet_bot.png" HeightRequest="200">
	<Image.Behaviors>
		<blur:BlurBehavior Radius="10" />
	</Image.Behaviors>
</Image>
As a result, you should receive such app:
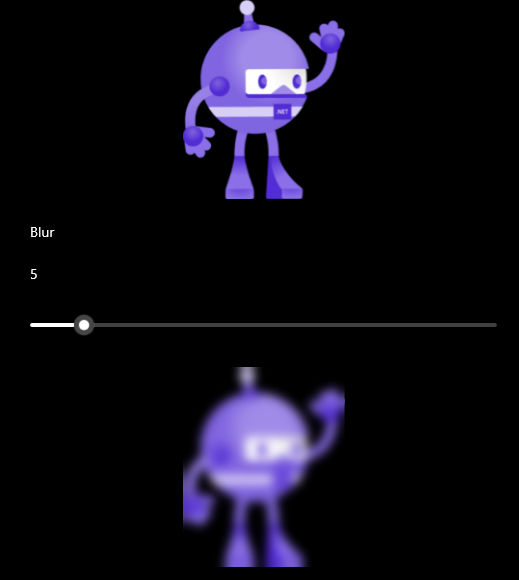
The full code with different effects can be found on GitHub.
Happy coding!